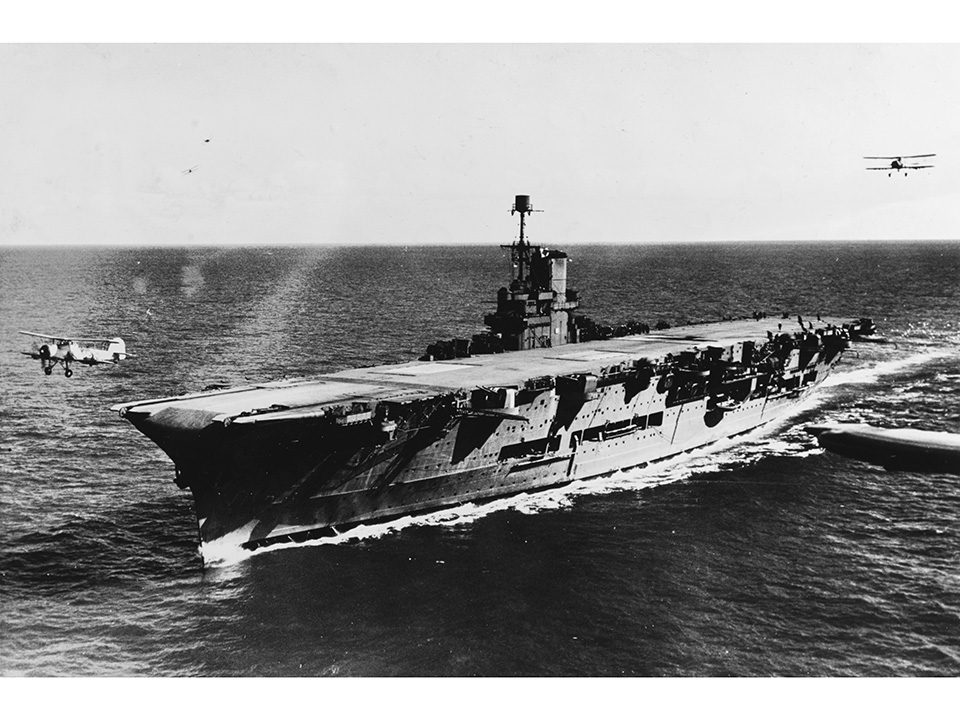
On the evening of November 11, 1940, 21 obsolete biplanes took off from the British aircraft carrier Illustrious. The aircraft were lumbering Fairey Swordfish torpedo bombers of the Royal Navy Fleet Air Arm; their target: Italian Navy warships anchored at the port of Taranto. The events of the next few hours would change the balance of power in the Mediterranean, and set the stage for the world-shaking events of December 7, 1941, on the other side of the world at Pearl Harbor, Hawaii.
Italy declared war on Great Britain on June 10, 1940. In doing so, Italian dictator Benito Mussolini opened a dangerous new front. Nazi Germany, with no overseas possessions and no significant surface navy, was a major land power in Europe but posed no serious threat to the British empire. Italy, though, changed the equation. Although the Italian Army was not very formidable, aircraft operating from mainland Italy and Sicily could strike at the strategically vital island of Malta. More important, the Italian Navy possessed a potent collection of modern warships that, if deployed properly, could dominate the Mediterranean Sea and close the Suez Canal, Britain’s best route to India and the rest of Asia.
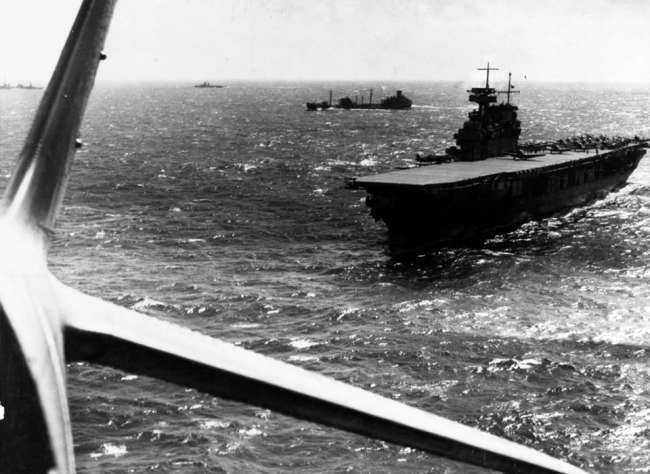
British planners had been considering an attack by carrier-based aircraft on the base at Taranto for several weeks before reconnaissance on November 9 confirmed that Italy’s entire battleship strength was based there. This included the battleships Littorio, Vittorio Veneto, Giulio Cesare, Caio Duilio, Andrea Doria, and Conte di Cavour, the first two of those being brand new, along with several cruisers and destroyers. The opportunity was too good to pass up.

On November 10, two British naval convoys from Gibraltar and Egypt converged on Malta, offloaded supplies, and then split again. This movement masked the departure of a task force, centered on the Illustrious, which veered off toward Taranto on the afternoon of November 11. The ensuing attack was dubbed Operation Judgment. At 8:35 that evening, the first wave of twelve Swordfish, half of them carrying torpedoes and the rest with bombs and flares, took off. The second wave of nine planes began taking off just under an hour later. Unfortunately, two of the planes collided on deck and one, damaged, had to abort.
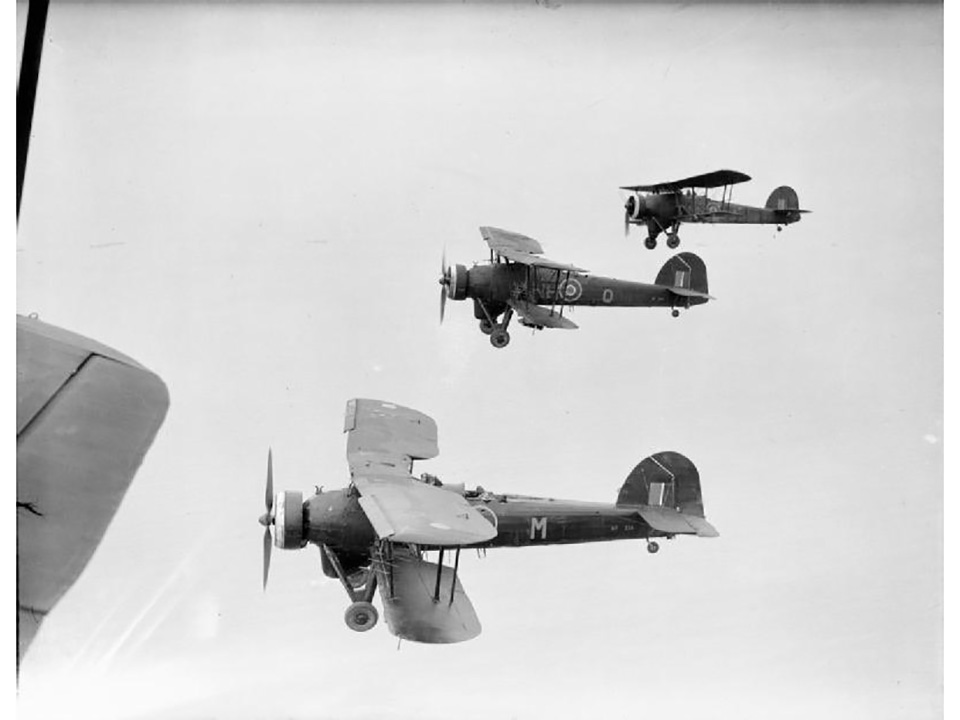
The Fairey Swordfish, lovingly called the “Stringbag,” was one of aerial warfare’s unlikeliest heroes. Designed in the early 1930s and entering service in 1936, it looked like a relic from World War I. In an era of all-metal monoplanes, it was a two-seater biplane with a fabric skin. With a top speed of 139 mph “going downhill,” as its’ pilots joked, the Swordfish was incredibly slow—so slow, in fact, that enemy fighters had trouble bringing the lumbering biplane down because they overtook it so quickly. The plane’s 690-hp Bristol Pegasus engine may have labored heavily to keep aloft, but it was very reliable. Pilots found the Swordfish a delight to fly. Said one test pilot, “it was unbelievably easy to fly . . . no aircraft could have been more tractable or forgiving.”
And the Swordfish proved spectacularly successful in taking out naval targets. In April 1940, a Swordfish operating off Norway sank a U-boat with bombs—the first successful attack of its type and one of many to follow. In May 1943, a Swordfish sank another U-boat with rockets—the first successful attack using that kind of weapon. In May 1941, Swordfish would play a critical role in the sinking of the German battleship Bismarck.
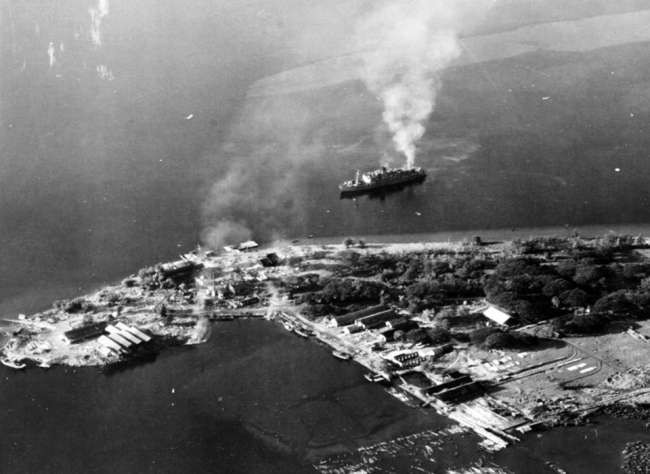
The first wave of 12 Swordfish reached Taranto in formation despite low visibility on the cloudy night of November 11, 1940. Italian anti-aircraft gunners spotted the approaching planes and opened fire immediately, lighting up the night sky and helping to guide the bombers to their targets. Some of the pilots dropped flares, illuminating the ships in the harbor for the torpedo bombers, which swooped in low over the water. Three of their six torpedoes hit two of the Italian battleships, although bombs dropped by other Swordfish caused no serious damage. Only one of the aircraft was shot down—the two-man crew survived—and the others returned safely.
The second wave, reduced to eight planes, now headed for Taranto, guided by flames from burning Italian ships and harbor installations. This time, three of the five torpedoes dropped hit their targets—again the bombs were ineffective. One of the Swordfish was shot down, killing the crew, and the rest returned to the Illustrious. Back on the aircraft carrier, the pilots prepared to rearm for further attacks, but approaching bad weather forced the British to withdraw.
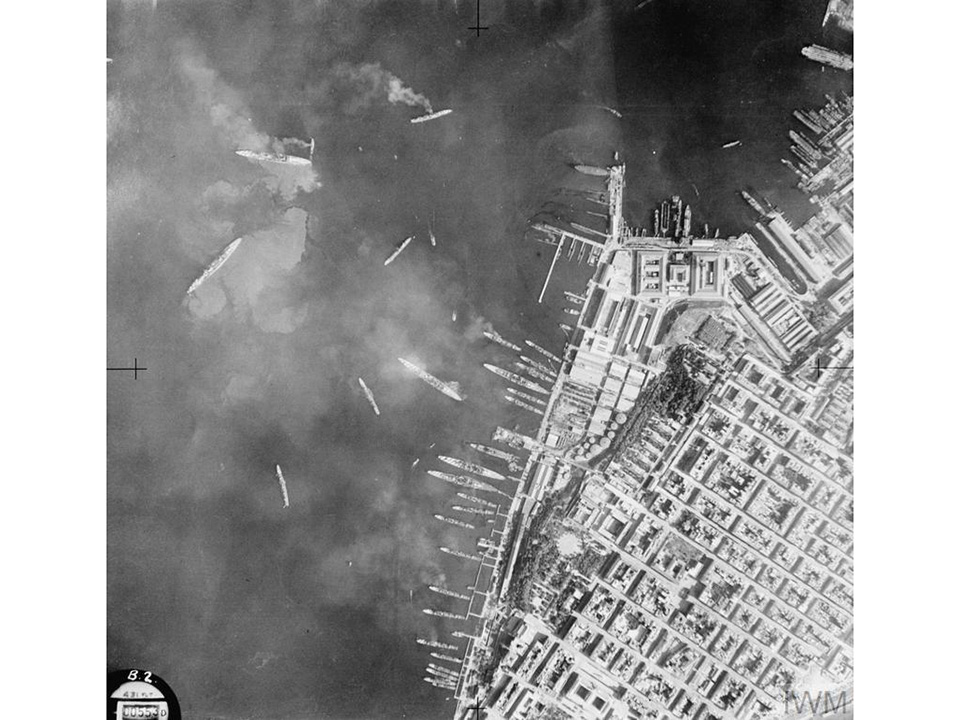
In two small attacks, however, the British had inflicted major damage on the Italian fleet. For the loss of two planes, the Swordfish had severely damaged the Littorio, Caio Duilio, and Conte di Cavour, inflicting almost 700 casualties. Hurt and shaken by this attack, the Italian Navy would never summon the resolve to challenge British naval power in the Mediterranean.
The Taranto attack made front page news across the world. The US Navy, both in Washington, D.C. and on station in the Pacific and Atlantic, studied the attack carefully, and suggestions were made to install torpedo nets at Pearl Harbor, which was recognized to be vulnerable. No action was taken, however, thanks to bureaucratic inertia. Japanese planners also studied Taranto, however. And they would take action on December 7, 1941.
Forgotten Fights: The Battle for Guadalcanal's Mount Austen, 1942
The fight for Mount Austen witnessed some of the hardest fighting on Guadalcanal. Its successful capture ensured the security of Henderson Field from Japanese artillery fire and infiltrators.

Ed Lengel, PhD
Edward G. Lengel is the former Senior Director of Programs for the National WWII Museum’s Institute for the Study of War and Democracy.
Cite this article:
MLA Citation:
APA Citation:
Chicago Style Citation: