The military campaign fought by British Commonwealth forces in East Africa during 1941 produced one of the great Allied victories of the Second World War. Fought in the Italian colonies of Eritrea, Italian Somaliland, and the recently occupied Ethiopia, it featured a force of British and Commonwealth troops (supported by a small number of British-led Ethiopian irregular forces) that was never any larger than 70,000 strong, defeating nearly 300,000 men.
The Italian leader Benito Mussolini declared war on Britain on June 10, 1940, but his numerically superior force only slowly took the offensive. The colony of British Somaliland was attacked in August and the defenders were forced to withdraw, but with only limited casualties; and three small outposts at Kassala and Gallabat in the Sudan and Moyale in Kenya were also seized. The local Italian military commanders, however, had suffered much greater losses than they had anticipated and chose to adopt a static defence.
In January 1941, a British counter offensive began with a force from Sudan invading Eritrea and northern Ethiopia. Three weeks later a second front was opened from Kenya with the invasion of Italian Somaliland and southern Ethiopia. On February 11, an Anglo-Indian force launched an amphibious assault from Aden and reoccupied British Somaliland. The fighting was most intense in the north where a bitter battle around the mountain pass at Keren did not end until March 26 and both sides suffered the worst casualties of the entire campaign.
The ultimate pattern of the British campaign was a pincer movement on the largest scale with two lines of flanking advance supported by irregular forces. General Sir Archibald Wavell had assumed command in the Middle East in August 1939, taking responsibility for a vast area covering nearly 4.5 million square miles. East Africa represented his southern flank and he described operations there as “an improvisation after the British fashion rather than a set piece in the German manner.” The two lines of advance converged on the Italian strongpoint at Amba Alagi.
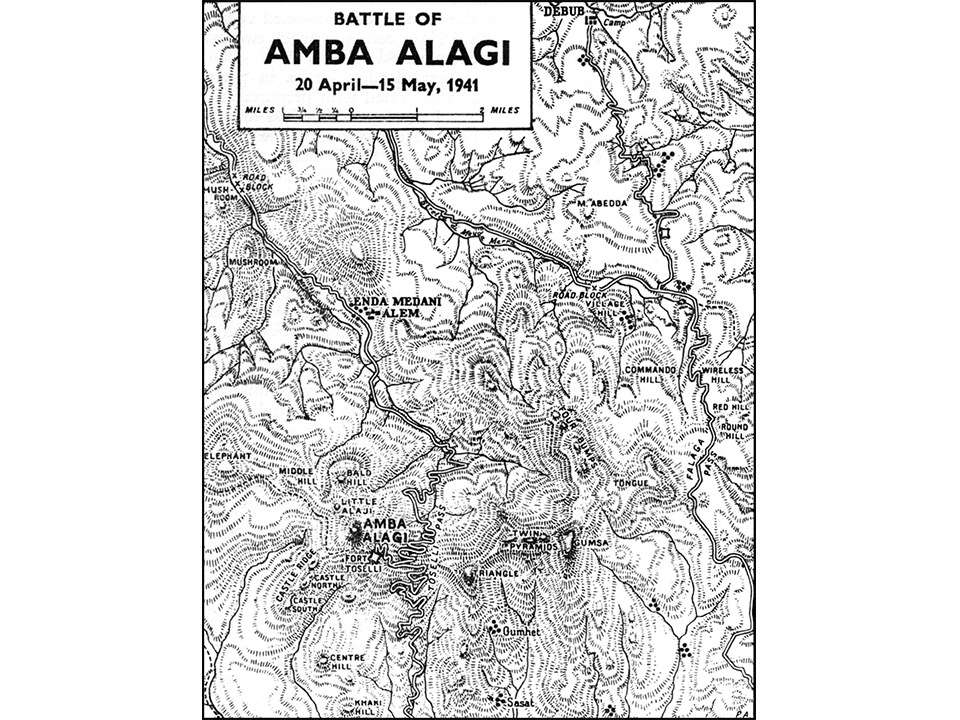
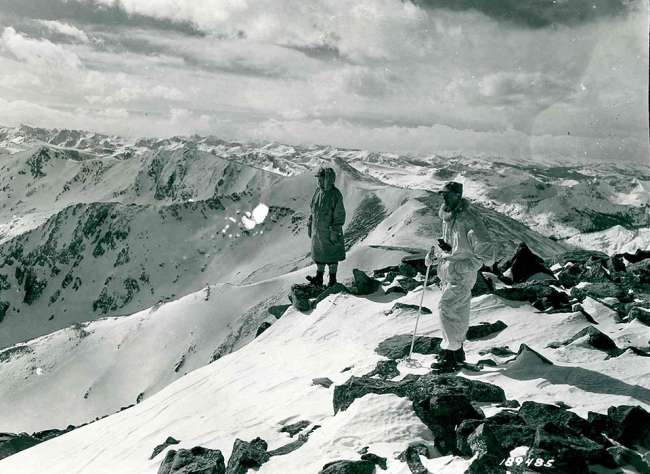
This was a peak about 12,000 feet high, the last 300 feet of which took the form of a pyramid crowned with a small chapel. It was described as being “very like a star-fish,” radiating a series of spokes and ridges running off in various directions. The hill tops were very cold and the continuous heavy rain showers added to the discomfort. It had been the scene of a very large battle during the Italian invasion some years before and the defending troops had held out for nine months before finally succumbing to a gas attack. It had also been the site where, in 1892, a force of 3,000 Italians was surrounded and eventually massacred. In 1941, Amba Alagi remained a very strong position, both naturally and also in terms of the work the defenders had done by adding many dugouts, shelters, and covering gun positions with scattered outposts, some of which were as far as five miles away.
On April 6 the Ethiopian capital of Addis Ababa had been liberated. Prince Amedeo of Savoy-Aosta, who two years before had become the third Viceroy of Italian East Africa, was faced with the defeat of his forces. Referred to more commonly as the Duke of Aosta, he had attended Eton and Oxford University and won a medal for valour in the First World War fighting on the same side as the British. Still only 40 years old when war broke out again in Europe, he was firmly opposed to being on Germany’s side. Having escaped the capital, he had moved to one of the last remaining mountain fortresses to conduct a last stand.
Opposing him was General Alan Cunningham, who had led the British Commonwealth advance from the colony of Kenya through Italian Somaliland. This had been remarkable in terms of speed, tempo, and the vast distances covered. With Addis Ababa secured, he was driven by Wavell’s direction that he should next move toward the ports from where troops could be embarked for service further north. The arrival of General Erwin Rommel and the decision to send military forces to support Greece had weakened significantly the British Commonwealth position in North Africa. Cunningham’s aim was now to link up with the Sudanese and Indian forces which were heading toward him from the port of Massawa which had surrendered on April 8 with its 40,000-man garrison.

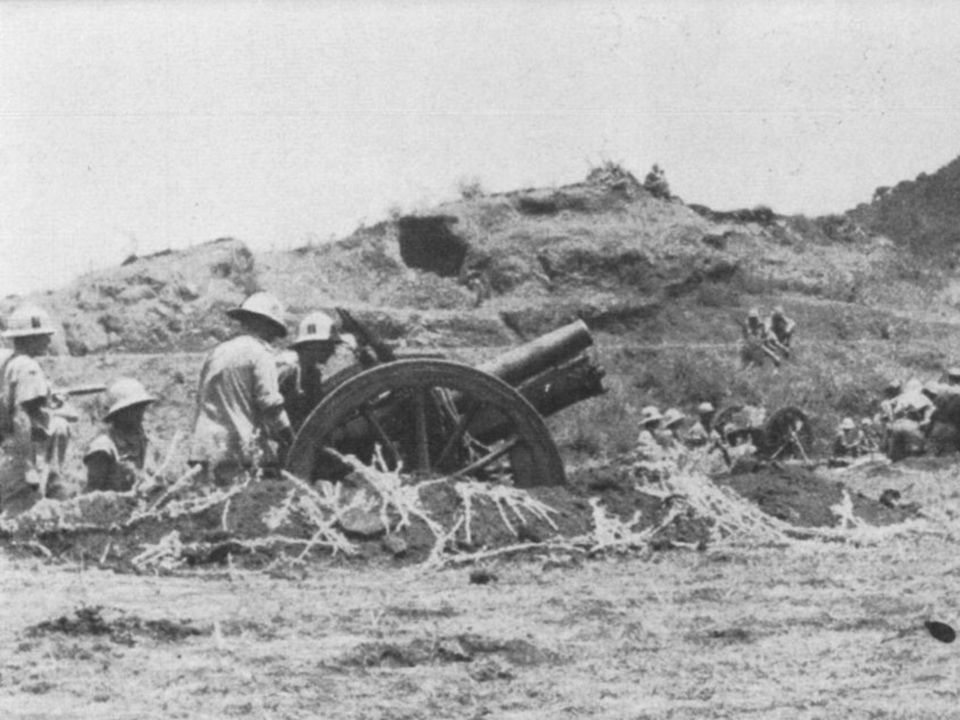
Amba Alagi’s capture was key to his plans. The defending garrison of around 9,000 men consisted of the last three remaining regular battalions from the Savoia Grenadiers, along with a few other odd detachments of troops. They had around 40 artillery pieces and a battery of naval anti-aircraft guns but there were no aircraft to support them. The defenders also knew that they could not link up with their colleagues at the other major remaining fortress at Gondar, as the route had been cut and the Patriots—the Ethiopian irregulars—increasingly controlled the surrounding territory, meaning there was no chance of escape.
Cunningham’s initial move was to assemble reinforcements of men and equipment along with dumps of ammunition and supplies necessary to conduct a potentially long siege. At the same time, and with no maps available showing the area, lines of advance had to be identified without attracting the enemy’s attention. The arrival of the rains made the attack more complicated. Supplies in some places had to be brought up by pack-mules making 10 hour round trips.
On May 3, the British general sent most of the mobile forces south-east toward the Falaga Pass, forcing the Italians to reinforce troops in that area. The following day another advance, this time to the west of the main road, created further doubt in the defenders’ minds and also captured a number of important features. The Italians were now confined to a restricted area which was susceptible to artillery bombardment. In the following days the defences were slowly worn down. On May 10, the key pass and surrounding ridge were occupied. Two days later the South African assault began. It had been a methodical plan. In the days that followed, as their casualties mounted, Italian morale fell.
With preparations for the final assault nearly completed, in the early morning of May 16 Italian envoys asked for an armistice and an opportunity to evacuate their casualties. A burst from an artillery shell had hit a fuel dump which then contaminated the only source of drinking water. According to one of the British junior officers, if the Italians had been able to hold out for another two weeks the attackers would have had to withdraw back to Asmara and wait for the end of the rainy season. Terms were eventually agreed that would allow Aosta to 'surrender with honour.' In return the Italians provided complete details of all the mines and booby traps that they had prepared and agreed not to sabotage or destroy any of their remaining equipment.
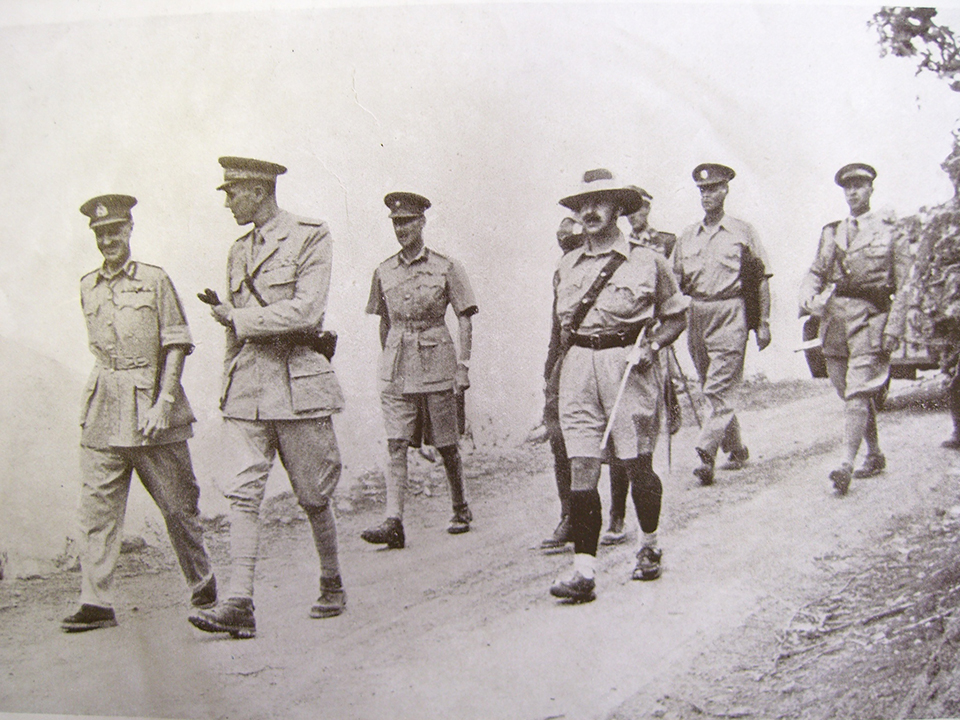
At 11:00 am on May 19, the surviving garrison of about 5,000 men marched down the hill to hand in their arms and be evacuated. British and Indian detachments presented arms as they passed, and the band of the Transvaal Scottish piped them past the saluting base. Their commander surrendered the following day and, accompanied by only three officers from his personal staff, was eventually moved on to Kenya. He died in captivity there in March 1942 of tuberculosis and was buried with full honours at the military cemetery in Nairobi.
Italian troops at the port city of Assab and the stronghold of Gimma did not capitulate until later that summer while a force held out in Gondar for almost seven months. Their surrender on November 27 marked the end of the campaign. The British Commonwealth forces had succeeded in capturing 50,000 prisoners and occupying 360,000 square miles at a cost of only 500 casualties, of whom just 150 were killed. In the process Mussolini’s East African Empire had been destroyed.
About the Author

Andrew Stewart, PhD, is Principal of the Military and Defence Studies Program and Professor of War Studies at the Australian War College and Australian National University’s Strategic and Defence Studies Centre. He is the author of The First Victory: The Second World War and the East Africa Campaign, which was runner-up for the Society for Army Historical Research’s prestigious Templer Medal.
Forgotten Fights
This article is the first in Edward G. Lengel's Forgotten Fights series. View more from the Senior Director of Programs below.
Cite this article:
MLA Citation:
APA Citation:
Chicago Style Citation: