Many types of restorations are possible and the type chosen depends on several factors including time, financial resources, and desired outcome. Functional restorations generally mean just getting the item operating often without any cosmetic work and without regard to originality of parts or configuration. Cosmetic repairs generally mean just making something look as if it’s restored without any regard to mechanical operation. Both of these types of restoration have their place. Some restorations are done in stages and are a combination of functional and cosmetic, but the gold standard in restoration is the frame off or frame up restoration.
Frame off or frame up both refer to the same sort of restoration. It is a restoration where the entire vehicle is disassembled down to the frame. Of course this supposes the vehicle has a frame. The majority of WWII era vehicles have a separate and distinct frame. Unibody construction incorporating the frame and body in one construction was first used in 1934. Today heavy trucks still have separate frames while passenger cars are built with unibody construction. Armored vehicles in World War II were however built without a frame. Their armored plates or castings formed a hull which supported the vehicle and took the place of both the frame and body. Regardless, when speaking of a frame off restoration the idea is that the whole vehicle is disassembled.
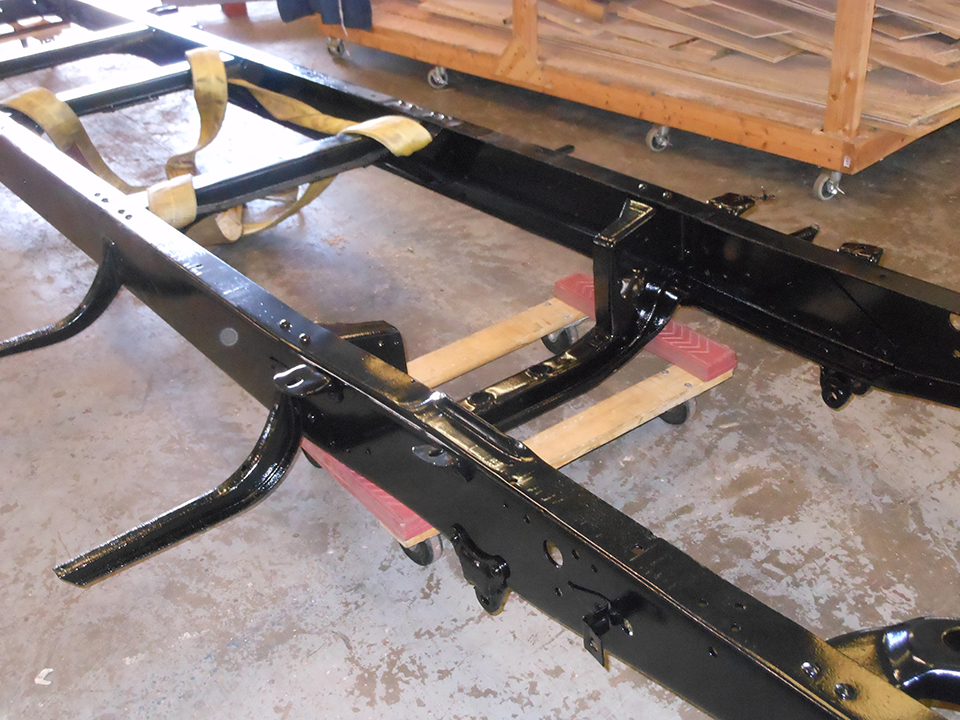
The frame of the fire truck after cleaning and painting. Photo courtesy of The National WWII Museum.
Another type of frame off restoration sometimes encountered is the basket case. While this term may mean different things to different people and in different contexts, in restorations it refers to a project where the vehicle has already been disassembled. You have to take a basket along to gather all the parts together when picking up your project. Restoring basket cases can have advantages as well as disadvantages. The price of the project is generally lower since the original restorer has decided they cannot complete the project and just want to be rid of it. Since the components have already been disassembled, the are easy to inspect so a true idea of the work involved can be more easily obtained. Components have also often been cleaned saving some work. Unfortunately some disadvantages can also be encountered. Usually it has been a long time since the project was disassembled. Parts, especially small ones, like nuts and bolts, have often been misplaced. It may be difficult to determine if everything is actually present. Without driving the vehicle, it is hard to tell the true condition of components. Finally, if the vehicle type is new to you it may not be at all clear how the parts fit together.
As noted, a frame off restoration is generally considered the gold standard in restorations. By separating every nut, bolt, and component, and inspecting and repairing every piece, the restorer can be assured of a vehicle in like new condition. While considerable work is involved in disassembly, it is by far the easiest way to access all components. Trying to clean and paint the inside of fender wells on the vehicle or the underside of the body without turning it over is nearly impossible.
Before starting a frame off restoration, it is important to secure a shop with enough space to get the work done. A vehicle that is disassembled will at least double in size, since the frame and the body both take up an equal amount of space. In fact, the project will more likely triple or quadruple in size once the axles, tires, engine, and transmission are all separated. You will also need a place to work and a place to store completed components. You will also need a lift of some sort to remove the body from the frame. If you are restoring a jeep it is possible to get four friends to lift the body off the frame. Larger vehicles will need something with greater capacity.
Consider also that you will be removing the engine and transmission. I have seen a great many improvised lifts over the years. Many of them have been frankly scary. Assemblies using the rafters of the building can be particularly troubling. A failure can result in a building collapse. A-frames provide a safer alternative provided they have the capacity required. At The National WWII Museum, I am fortunate to have not only a forklift with 6,000 pound capacity, but also an a-frame rated for 4,000 pounds. Together these have solved most lifting problems.
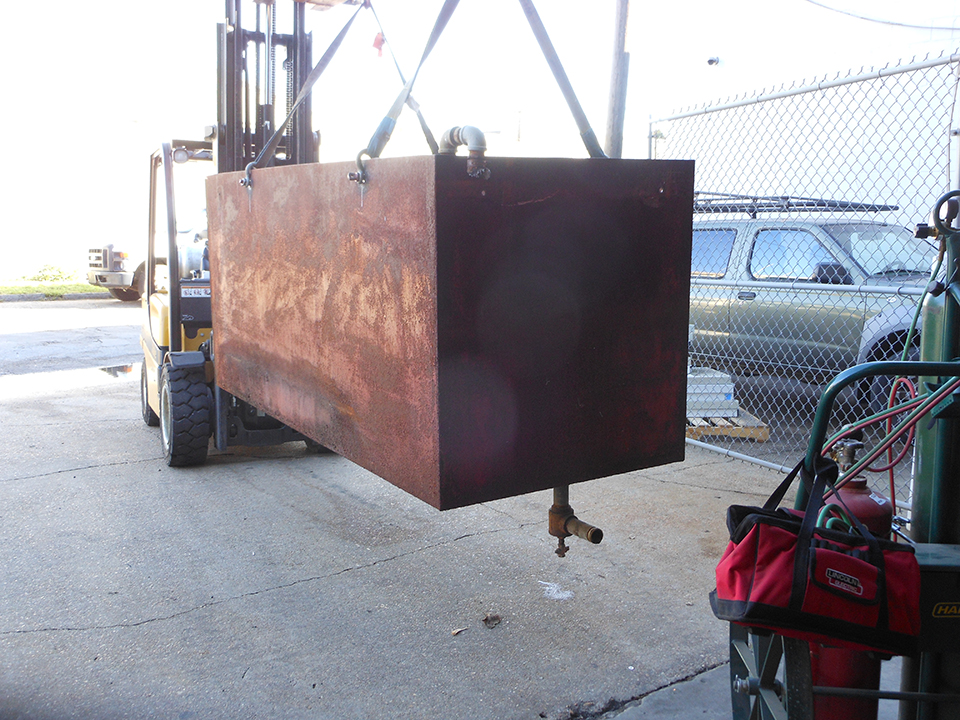
Removing the water tank from the fire truck was an easy job with the Museum's forklift. Photo courtesy of The National WWII Museum.
With a shop and lifting gear secured, it’s time to start taking things apart—well, almost time. Before beginning disassembly I highly recommend you first secure all available manuals on your vehicle and get a digital camera. WWII US vehicles had a variety of manuals available including operators manuals, manuals for basic maintenance, more advanced overhaul manuals, parts manuals, and sometimes manuals for separate component parts of the vehicle. Not every vehicle has every one of these but it is worth getting whatever is available. Some vendors even offer package deals at a discount for a reproduction copy of every manual available for a particular vehicle. For vehicles or equipment without a manual, check online and print off available information. Put this together in a three ring binder for future reference. You might even find a copy of needed manuals available as a free PDF. Your other essential item is a digital camera. Take photos before you start taking things apart. Look at your photos before you remove parts to be sure you captured the view you may need. Never assume that you will remember how this or that went together because you will not. Organize and store your photos in a safe place. It would be a shame to have everything on your phone and then lose your phone. Now you are ready to start disassembly.
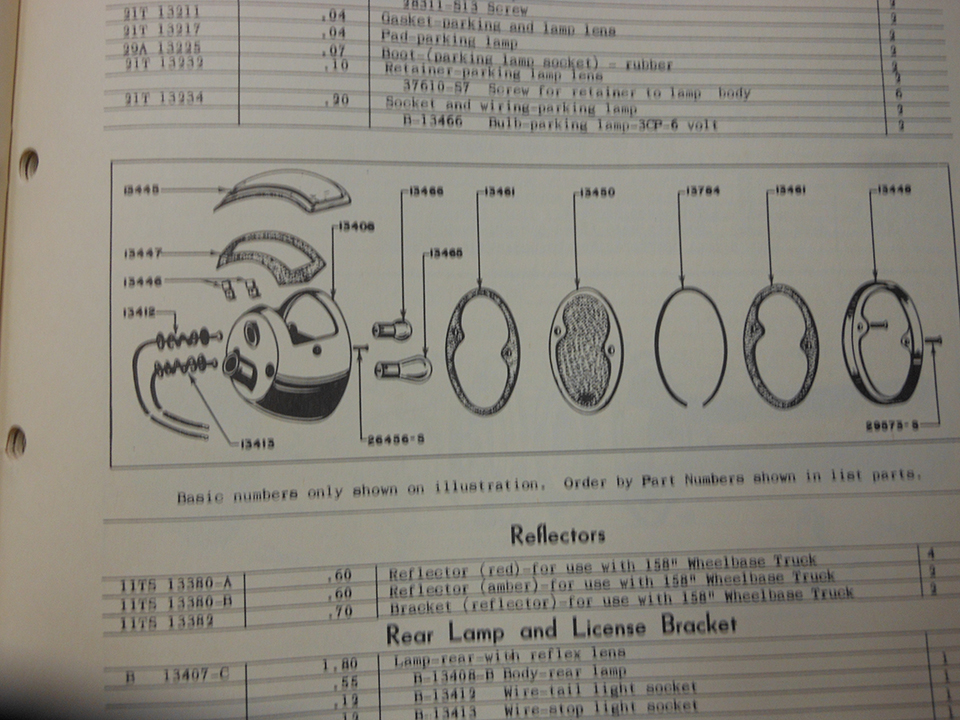
This parts manual provided a detailed drawing of the tail light and component parts. Photo courtesy of The National WWII Museum.
Stay tuned for the next installment of shop talk when we will discuss taking your vehicle apart.
Shop Talk: I See Stars
Although the star was used as the main identification for Allied vehicles in World War II, its design changed over time.
Tom Czekanski
Cite this article:
MLA Citation:
APA Citation:
Chicago Style Citation: